If you want to keep your food fresher for longer, learning how to vacuum seal is a game changer. When you use vacuum seal bags, you remove air and create an oxygen-free space that slows down spoilage and keeps flavors locked in. Studies show vacuum sealing can make meats last up to three years in the freezer, and it even helps cut down on food waste. BN PACK offers high-quality vacuum seal bags that protect everything from meats to snacks. Ready to see how easy it is to preserve your food?
Choosing Vacuum Seal Bags
When you start vacuum sealing, picking the right vacuum seal bags makes a big difference. Not all bags are created equal, and the right choice helps you keep food safe, fresh, and tasty.
Types of Bags
You’ll find several types of vacuum seal bags on the market. Here’s a quick rundown:
Mesh lined bags work best with suction vacuum sealers. The mesh lets air escape so you get a tight seal.
Flat and embossed bags come in different thicknesses. Thicker bags are great for foods with sharp edges or for storing liquids.
Rolls let you cut custom sizes, which is handy if you want to seal big cuts of meat or small snacks.
Special bags like zipper pouches, retherm pouches for boiling, and bone guard sheets help with unique storage needs.
BN PACK offers all these options. Their vacuum seal bags use food-grade, BPA-free materials that meet strict FDA, SGS, and ISO standards. You can use them with almost any vacuum sealer, so you don’t have to worry about machine compatibility.
What to Consider
When choosing vacuum seal bags, think about what you plan to store. Thicker bags work better for liquids and bulky foods. Smaller bags are perfect for snacks or single portions. Always leave enough space at the top of the bag for a strong seal.
Tip: Check your bags for damage before sealing. A tiny tear can let air in and spoil your food.
Food safety matters, too. BN PACK vacuum seal bags hold international certifications like BRC and meet Good Manufacturing Practices. This means you can trust them for both home and commercial use. Their bags keep air and moisture out, which helps prevent freezer burn and keeps food fresh longer.
If you run a business, you’ll love how BN PACK bags work with both home and commercial vacuum sealers. They’re tough, reliable, and help you save money by reducing waste and extending shelf life.
Preparing Food
Cleaning and Portioning
Getting your food ready before vacuum sealing makes a big difference in freshness and safety. Start by washing all produce under running water. Pat everything dry with a clean towel to remove extra moisture. Trim away any bruised or damaged spots to keep bacteria away. Always work on a clean surface and wash your hands before handling food.
Here’s a simple step-by-step guide to help you prepare:
Wash fruits and vegetables thoroughly.
Dry them well to prevent extra moisture inside the bag.
Pre-freeze high-moisture foods like berries or sliced veggies on a baking sheet for about an hour. This keeps them from sticking together or getting crushed.
For meats, use paper towels to soak up any surface moisture.
Portion your food into meal-sized amounts. If you have items like chicken breasts or burger patties, separate them with parchment paper for easy use later.
Blanch vegetables by boiling them briefly, then cooling them in ice water. This step locks in color, flavor, and texture.
Label each package with the contents and date. This helps you keep track of what you have and when you packed it.
Organize your freezer using the First In, First Out (FIFO) method. Use older packages before newer ones.
Tip: Not all foods are great for vacuum sealing. Skip raw onions, mushrooms, and garlic. These can spoil faster or cause unwanted odors.
BN PACK vacuum seal bags work perfectly for a wide range of foods—meat, vegetables, cheese, grains, and more. You can trust them for both home and commercial kitchens.
Bag Filling Tips
Filling your vacuum seal bags the right way helps you get the best seal and keeps your food safe. Here are some tips to make the process smooth:
Choose the right bag size for your food. Leave at least an inch or two at the top for sealing.
Keep your workspace clean to avoid contamination.
Use scoops or funnels for small or messy foods.
Don’t overfill the bag. Spread the food out evenly and gently shake or tap the bag to remove air pockets.
Make sure the bag opening stays clean and flat. Wipe away any crumbs or moisture before sealing.
For liquids, cool them to room temperature or refrigerate first. If your sealer starts to pull liquid out, stop and seal right away.
Double seal the ends for extra protection, especially with juicy foods or liquids.
Check the seal for gaps or wrinkles. Reseal if needed to keep air out.
Note: BN PACK bags are strong and reliable, so you can store everything from fresh produce to leftovers with confidence.
Sealing Food
Vacuum sealing is where the magic happens. You’ve got your food prepped and your bags ready. Now, let’s walk through how to vacuum seal both solid foods and liquids so you get the best results every time.
Solids
Sealing solid foods is straightforward, but a few simple steps can make a big difference in freshness and safety. Here’s how to vacuum seal solid foods like a pro:
Cool your food if it was cooked or heated. Never seal hot items. This keeps bacteria away and prevents steam from interfering with the seal.
Choose the right bag size. Place your food inside, leaving at least two inches at the top for sealing.
Spread the food out evenly. Press it into the corners to avoid air pockets.
Wipe the bag’s opening to keep it clean and dry. Fold the top edge outward before filling to help with this.
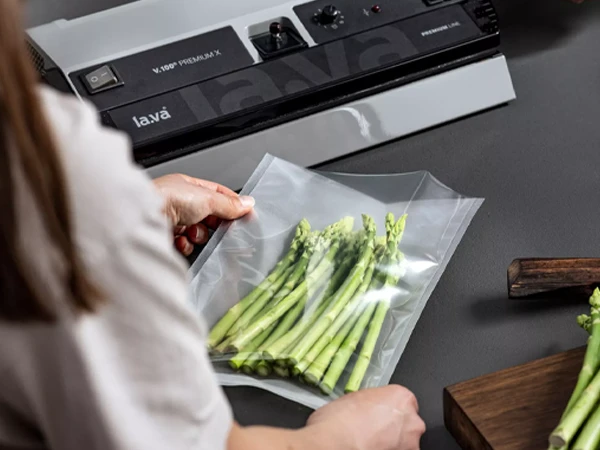
Insert the open end into your vacuum sealer. Make sure it’s flat and wrinkle-free.
Activate the vacuum sealer. Some machines have separate vacuum and seal buttons, so follow your model’s instructions.
Watch as the air gets pulled out and the bag seals tight.
Check the seal for gaps or wrinkles. If you see any, reseal the bag.
Store your sealed food in the fridge, freezer, or pantry, depending on what you’re preserving.
Tip: Blanch veggies like cauliflower or brussels sprouts before sealing. This stops gas buildup and keeps them fresh.
BN PACK vacuum seal bags are heat-resistant and perfect for freezing, sous vide cooking, and long-term storage. You can trust them to lock in flavor and keep out freezer burn.
Liquids
Vacuum sealing liquids takes a little more care, but you can do it easily with the right approach. Here are some tips for vacuum sealing liquids and keeping your kitchen mess-free:
Always cool or refrigerate liquids before sealing. Hot or warm liquids can create steam and mess up the vacuum sealing process.
For soups, sauces, or stews, try freezing liquids flat in a shallow container or tray first. Once frozen, pop the block into a bag for sealing. This makes stacking in your freezer a breeze.
If you want to seal liquids that aren’t frozen, use manual control on your vacuum sealer. As soon as you see liquid moving toward the seal, hit the seal button to stop suction and close the bag.
Keep the bag’s opening dry. Fold the top over before filling, then unfold and wipe if needed.
Leave extra space at the top of the bag. This helps prevent spills and gives you a stronger seal.
Double seal the bag ends for extra protection against leaks.
Place the bag on a slight slope, with the opening higher than the liquid. This keeps liquid away from the vacuum area.
Avoid freezing liquids in cubes. Flat packages save space and seal better.
Note: BN PACK vacuum seal bags have textured channels and strong oxygen barriers. They help remove air efficiently and keep your liquids safe during freezing and storage.
Here’s a quick table of common issues when vacuum sealing liquids and how to fix them:
Issue | Why It Happens | How to Fix It |
|---|---|---|
Moisture on Bag Surface | Wet edges prevent a good seal | Dry the bag thoroughly before sealing |
Overfilled Bags | Too much liquid leaks during sealing | Leave extra space at the top |
Wrinkles or Gaps in Seal | Bag not flat or smooth in the sealer | Smooth out the bag and reseal if needed |
Damaged or Dirty Seal Bar | Food or residue blocks the seal | Clean the seal bar regularly |
Misaligned Bag | Bag not placed correctly in the machine | Align the bag as per your vacuum sealer’s guide |
Troubleshooting Tips
Sometimes, things don’t go as planned. Here are some quick fixes for common sealing problems:
Always keep the sealing area clean and dry. Even a drop of liquid can stop a good seal.
Fold the top of the bag outward before filling to keep the edge clean.
For foods with sharp edges, double bag or add a layer of paper towel inside to prevent punctures.
Pull the bag tight and flat before sealing to avoid wrinkles.
If you notice air getting back in, check for tiny holes or leaks. Listen for hissing sounds.
Clean your vacuum sealer’s sealing strip and heating element often. Replace them if they look worn.
Don’t overfill bags. Too much food or liquid can cause leaks and weak seals.
Use only bags recommended for your vacuum sealer. BN PACK bags work with most machines and offer reliable results.
Tips for vacuum sealing: Always label your bags with the date and contents. This helps you use older items first and keeps your freezer organized.
BN PACK vacuum seal bags are built for heat resistance. You can use them for sous vide cooking at temperatures up to 200°F. This means you can cook food evenly, lock in nutrients, and enjoy restaurant-quality meals at home. The airtight seal also keeps out bacteria and oxidation, so your food stays fresh longer during freezing or storage.
With these steps and tips, you’ll master vacuum sealing solids and liquids in no time. Enjoy fresher food, less waste, and more convenience every day!
Storage and Safety
Shelf Life
Vacuum sealing can make a huge difference in how long your food stays fresh. When you remove air from the bag, you slow down spoilage and keep flavors locked in. This method works especially well for freezing. You can keep raw red meat fresh for up to 2–3 years instead of just 6 months. Poultry and fish also last much longer—up to 2 years. Cooked meats can stay good for 2–3 years, and blanched vegetables can last up to 2–3 years in the freezer. You also avoid freezer burn, which can ruin taste and texture.
Here’s a quick look at how vacuum sealing and freezing extend the shelf life of food:
Vacuum sealing removes oxygen, which slows down bacteria, mold, and yeast.
Freezing vacuum-sealed food prevents freezer burn and keeps moisture inside.
Labeling each bag with the date helps you use older items first.
Regularly check your bags for leaks or damage to keep food safe.
If you store dehydrated foods, vacuum sealing also helps. It limits oxygen exposure and keeps your snacks or dried goods fresh for years.
Best Practices
You want your food to stay safe and tasty. BN PACK vacuum seal bags meet FDA, SGS, and ISO standards, so you know your food is protected from harmful chemicals. These certifications mean the bags are food-grade and safe for direct contact.
To get the best results, follow these tips:
Always store vacuum-sealed food in the fridge or freezer. This keeps bacteria away and extends the shelf life of food.
Blanch certain vegetables before sealing to stop gas buildup.
Use the FIFO (First In, First Out) method. Eat older food first.
Check the seal on each bag before storing. Reseal if you see air inside.
When reheating, make sure the food reaches 70ºC (about 160ºF) for at least two minutes. Cut a corner off the bag if microwaving to let steam escape.
Never leave vacuum-sealed food at room temperature unless it’s dry goods like grains or nuts.
Tip: Always inspect your food before eating. If you see signs of spoilage or smell something off, throw it away.
With these steps, you can enjoy longer-lasting, fresher food and avoid freezer burn every time you use your BN PACK vacuum seal bags.
You now know how easy it is to keep your food fresh and safe at home. Just clean, portion, and seal your meals with the right vacuum seal bags. BN PACK gives you strong, reliable options for every kitchen. Want to cut down on waste and enjoy better-tasting food? Give vacuum sealing a try and see the difference for yourself!
FAQ
How do I know if my vacuum seal bag sealed properly?
Check the seal line. It should look smooth and even, with no gaps or wrinkles. Squeeze the bag gently. If you see air bubbles or hear a hiss, reseal the bag for best results.
Can I reuse BN PACK vacuum seal bags?
You can reuse bags for dry foods if they stay clean and undamaged. Always wash them with warm, soapy water and dry completely. Avoid reusing bags that held raw meat, fish, or greasy foods.
Are BN PACK vacuum seal bags safe for sous vide cooking?
Yes! BN PACK vacuum seal bags are heat-resistant and food-grade. You can use them for sous vide cooking up to 200°F. They keep your food safe and lock in flavor during cooking.
What foods should I avoid vacuum sealing?
Skip raw onions, garlic, and mushrooms. These foods can spoil quickly or cause strong odors. Also, avoid vacuum sealing soft cheeses and some soft breads, as they may get crushed.
Do BN PACK vacuum seal bags work with all vacuum sealers?
BN PACK vacuum seal bags fit most standard vacuum sealing machines. You can use them with both home and commercial models. Always check your sealer’s instructions for compatibility.