
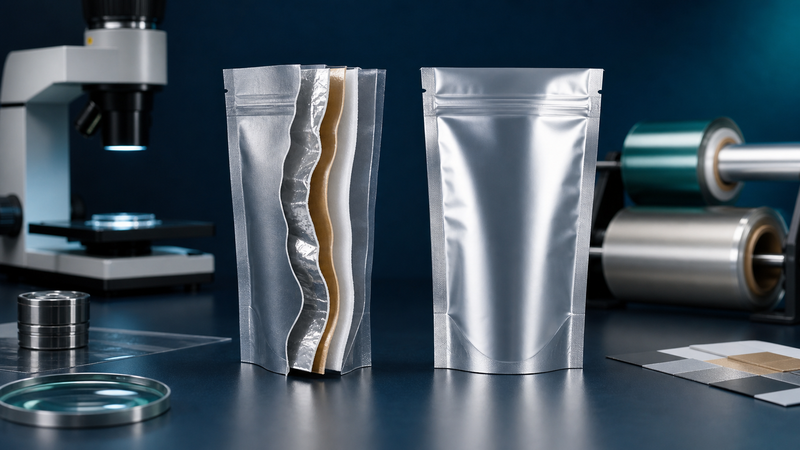
Delamination occurs when two or more layers in a flexible package lose adhesion and begin to separate. It may appear as bubbles, cloudy patches, tunnels, edge lifting, ink transfer, or a complete split between films. The pouch can still look acceptable when it leaves the converting plant, then fail after filling, heat processing, storage, or distribution. That delay makes delamination especially expensive: the affected inventory may already contain valuable product and printed branding.
Most performance pouches are not made from one film. They combine a printable outer web, barrier layer, adhesive, and sealant layer so each component performs a different job. This is the logic behind modern laminated packaging. The same multilayer design that provides strength and barrier also creates interfaces that must remain bonded throughout the package life cycle. Preventing failure therefore requires more than selecting a strong adhesive. The whole structure, process, product, and use environment must be compatible.
What Delamination Looks Like
Start by documenting the symptom rather than assuming the cause. Small silver or cloudy areas can indicate poor wetting, trapped air, or local contamination. Long channels may point to coating skips, low adhesive weight, or uneven nip pressure. Separation around a seal may be related to excessive sealing temperature, dwell time, or stress concentration. Separation across a broad printed area may involve ink–adhesive incompatibility or insufficient ink anchorage.
Location and timing are diagnostic clues. A defect visible on the incoming empty pouch probably originated during printing, lamination, curing, or slitting. A defect that appears only after filling may involve oil, fragrance, moisture, acidity, or another product component. Failure after retort, hot fill, freezing, or shipping suggests that the final structure was not validated for the actual thermal and mechanical cycle. Save unopened controls and failed packs from several positions in the lot; one dramatic sample rarely tells the full story.
The Main Causes
Poor surface treatment is a frequent starting point. Polyolefin films have relatively low surface energy, so printers and laminators often use corona treatment to improve wetting. Treatment can decay during storage. If the film is old, contaminated, or treated on the wrong side, ink and adhesive may not anchor consistently. Suppliers should identify the treated side and verify dyne level close to use, while remembering that a dyne pen is a process check rather than a complete bond guarantee.
Adhesive application and curing are equally important. Too little coating can leave microscopic voids; too much can create cure, appearance, or residual-solvent problems. Incorrect mix ratio, poor metering, low oven efficiency, excessive line speed, or inadequate curing time can weaken the bond. Two-component polyurethane systems continue reacting after lamination, so converting or filling too early may expose an immature bond to heat, pressure, or chemicals.
Ink, coatings, and adhesives must function as one chemical system. High ink coverage, metallic pigments, slip additives, residual solvent, or an unsuitable overprint varnish can reduce interlayer adhesion. Product resistance is another issue. Oils, essential oils, alcohol, aggressive flavors, acids, and surfactants can permeate the sealant and attack the adhesive interface. The package may need a more resistant sealant, adhesive, or barrier—not simply a thicker version of the original structure.
Finally, mechanical and thermal stress can initiate or enlarge a weak area. Tight folds, gussets, sharp product edges, high drop impact, vacuum, boiling, freezing, and retort conditions all challenge the laminate. Choosing among flexible packaging materials must therefore start with the complete exposure profile: product chemistry, fill temperature, process temperature, storage time, transport climate, and how consumers open and reclose the pouch.
A Structured Investigation
Trace the failure by lot, roll, lane, and time. Review substrate certificates, treatment checks, adhesive batch and ratio, coating weight, oven temperature, web tension, nip settings, line speed, cure time, and slitting date. Compare retained samples from before lamination, after curing, after pouch making, and after filling when available. If only one roll or lane fails, the pattern may reveal a localized process problem; if every roll fails after product contact, compatibility becomes more likely.
Next, separate the laminate carefully and determine the failure plane. Does the adhesive remain on one film, split cohesively, release from the ink, or pull ink from the outer web? Microscopy and chemical analysis can help a qualified laboratory, but even a controlled visual comparison is useful. Evaluate both unprinted and heavily printed zones because bond strength can differ. Record seal-area failures separately from body-laminate failures.
Peel testing provides a comparative measure of bond strength, but the result depends on strip width, peel angle, speed, conditioning, and where the specimen was cut. Use a documented method and compare it with an approved reference, not an isolated number. Repeat after curing and after relevant aging or product-contact conditioning. For packages exposed to heat, cold, humidity, or flexing, test after those stresses as well.
A pilot filling study adds evidence that laboratory coupons cannot provide. Use production-representative pouches, the actual product, and the normal sealing window. Inspect immediately, after the intended cure or hold period, and at scheduled points during accelerated and real-time storage. Include upright, inverted, and compressed orientations when they are credible. Track appearance, odor, bond strength, seal performance, and barrier-related product changes. The objective is not to force a pass under one setting; it is to demonstrate a robust operating window that tolerates ordinary variation in material, equipment, environment, and handling.
Material and Process Fixes
Fix the verified mechanism, not just the visible symptom. If surface energy is inadequate, improve film handling, treatment timing, and verification. If coating is uneven, inspect metering, viscosity control, filtration, tension, and nip conditions. If curing is incomplete, correct mix ratio and oven performance, then protect the full cure window before slitting or filling. If retained solvent is involved, balance drying capacity, ink load, web speed, and solvent selection with the converter.
For chemical attack, conduct compatibility trials with the real product. A resistant adhesive system, higher-barrier intermediate layer, or different product-contact sealant may be required. Film selection matters: an article comparing BOPP vs CPP films illustrates why two polypropylene-based films can still serve different roles. BOPP is commonly valued for stiffness and print performance, while CPP can provide sealability and toughness. The final choice must be validated as a structure, not inferred from resin family alone.
Package geometry can also reduce stress. Increase corner radii, prevent hard creases across brittle barrier layers, create adequate clearance around zippers and spouts, and avoid overfilling. For ordinary plastic pouches, seemingly small changes in thickness distribution, seal width, or gusset design can keep loads away from vulnerable laminate edges. Do not approve a fix until converted pouches have passed the intended filling, sealing, storage, and distribution simulation.
Prevention Checklist
- Define the product, process, and distribution conditions before specifying the laminate.
- Approve substrates, inks, coatings, adhesives, and sealants as a tested system.
- Control treatment level, adhesive ratio, coating weight, drying, nip conditions, and cure time.
- Retain reference samples and production records by roll and lot.
- Test bond strength in printed and unprinted areas before and after relevant conditioning.
- Run a pilot fill with the actual product and the harshest credible life-cycle conditions.
- Set visual and functional acceptance criteria with the converter before mass production.
Conclusion
Pouch delamination is usually a system failure, not a single-material defect. Surface condition, ink, adhesive, curing, product chemistry, pouch geometry, and end-use stress all interact. A disciplined investigation identifies where separation occurs and when it begins; a disciplined specification prevents recurrence. Work with the film, ink, adhesive, converting, filling, and testing teams as one chain. That approach protects barrier performance, appearance, seals, and—most importantly—the product inside.