Wondering how to roast coffee beans as a beginner? You just need a few simple tools and a little patience. You don’t need fancy equipment or expert skills. Home roasting techniques let you control the flavor and freshness of your coffee. Many people love roasting beans at home because:
You save money by buying unroasted beans.
You can create your own blends and roast levels.
You enjoy fresh coffee every time.
You get to experience the art of coffee roasting.
Roasting your own coffee feels rewarding and fun. Why not give it a try?
How to Roast Coffee Beans at Home
Roasting Process Overview
Learning how to roast coffee beans at home feels exciting and simple. You can use several beginner-friendly methods. Some people use a pan or skillet, while others try an oven or even a popcorn popper. You might see folks roasting beans in a colander over a heat gun or on a barbeque. Each method gives you a chance to experiment and find what works best for you.
Here’s a quick look at the basic steps:
Preparation: Measure your green coffee beans. Spread them evenly on your roasting tray or pan.
Drying phase: Start with low heat. Let the beans dry out and lose moisture.
Maillard reaction: As the beans heat up, they turn yellow and start to smell sweet.
First crack: Listen for a crackling sound around 350°F. This means you’ve reached a light to medium roast.
Second crack: If you keep roasting, you’ll hear a louder crack at about 400°F. This marks a dark roast.
Cooling: Quickly cool your beans using a tray or sieve to stop the roasting process.
Resting: Let your beans rest for 24–48 hours. This helps the flavors develop.
Tip: Use a thermometer and a timer to track your roast. These tools help you get consistent results every time.
Why Roast Your Own Beans
Roasting your own coffee beans gives you fresh, flavorful coffee every time. When you roast at home, you get to enjoy coffee at its peak. Freshly roasted beans keep their unique flavors and aromas, which often fade in pre-roasted beans. You can taste the difference in every cup.
You also save money. Buying green coffee beans costs about the same as one fancy drink at a coffee shop, but you get enough beans for many cups. Over time, these savings add up, especially if you drink coffee every day.
You control the flavor, roast level, and blend. You can try different beans and methods until you find your favorite. Learning how to roast coffee beans at home turns your daily coffee into a fun, hands-on experience.
Equipment and Ingredients
What You Need
You don’t need a fancy setup to start roasting coffee at home. You can use a simple pan, an oven, or a popcorn popper. If you want to upgrade, you can check out the best home coffee roasters for more control and consistency. Here’s a quick look at the price ranges for different types of roasters:
Type of Roaster | Price Range |
|---|---|
Basic Models | $45 – $225 |
Mid-Range Models | $500 – $1,000 |
High-End Models | $1,750 – $5,850 |
Besides a roaster, you’ll need green coffee beans, a metal colander or sieve for cooling, a wooden spoon for stirring, and a timer. A thermometer helps you track the temperature. You might want a scale to measure your beans. If you roast indoors, make sure you have good ventilation.
Tip: Start with small batches. You’ll learn faster and waste less coffee.
Choosing Green Beans
Picking the right green beans makes roasting easier and more fun. Some beans work better for beginners because they’re forgiving and have clear roasting signals. Here are a few great options:
Brazilian Beans: These beans have a wide roasting window and a classic chocolate and nutty flavor. They’re flexible and easy to work with.
Colombian Supremo: You’ll notice a loud first crack with these beans. They’re large, uniform, and have a fruity, sugary taste.
Guatemala Antigua: These medium-density beans roast predictably. Even if you make mistakes, you’ll still get a chocolatey cup.
Try different beans to find your favorite flavor. You can experiment with blends once you feel confident.
Safety Tips
Roasting coffee gets hot and smoky. You need to stay safe while you work. Here are some important safety tips:
Make sure your space has good ventilation. Roasting can release fumes.
Wear heat-resistant gloves and an apron. You’ll protect your hands and clothes from burns.
Clean your equipment often. Old coffee oils can catch fire.
Learn basic safety routines. Know what to do if something goes wrong.
Note: Never leave your roasting setup unattended. Stay close and keep an eye on your beans.
Roasting Process: Step-by-Step Methods
Pan Roasting
Pan roasting is one of the oldest ways to learn how to roast coffee beans at home. You just need a heavy skillet or pan and a stove. This method gives you hands-on control over the roasting process. You can watch the beans change color and listen for the first crack.
Here’s how you can do it:
Place your pan on medium heat.
Add a single layer of green coffee beans.
Stir or shake the beans constantly with a wooden spoon.
Watch for color changes and listen for the first crack. This usually happens after 5–10 minutes.
Remove the pan from heat when you reach your desired roast level.
Pour the beans into a metal colander to cool quickly.
Tip: Keep stirring! If you stop, the beans can scorch or roast unevenly.
Advantages of pan roasting:
You get a wide range of roast levels, from light to dark.
Direct contact with the hot pan creates unique, caramelized flavors.
You control the heat and timing, making the roasting process more personal.
Disadvantages of pan roasting:
You need to stir constantly, which can get tiring.
Beans can scorch or roast unevenly if you don’t pay close attention.
Pan roasting is fun and inexpensive. You don’t need special equipment, just patience and a watchful eye.
Oven Roasting
Oven roasting is another simple way to start your coffee bean roasting journey. You can use a baking tray and your kitchen oven. This method works well for larger batches and gives you a chance to experiment with average roasting times.
Here’s a step-by-step guide:
Preheat your oven to 400°F (205°C).
Spread green coffee beans in a single layer on a baking tray.
Place the tray in the oven.
Stir the beans every few minutes for even roasting.
Listen for the first crack. For light roasts, this happens around 6–9 minutes. For darker roasts, wait until 10–11 minutes.
Remove the tray when you reach your preferred roast level.
Cool the beans quickly in a colander or sieve.
Note: Keep your oven clean and ventilated. Roasting coffee beans can get smoky.
Common challenges with oven roasting:
Scorching can happen if the oven is too hot or overloaded.
Tipping causes small burn marks at the tips of beans.
Internal scorching results from uneven moisture.
Over-roasted coffee tastes bitter and loses flavor.
Quakers are underdeveloped beans that lower cup quality.
You might face issues like inconsistent temperature or overloading the tray. Try roasting small batches and warming up your oven before starting. This helps you avoid uneven roasting and flavor problems.
Popcorn Popper
A popcorn popper is a popular tool for beginners who want to learn how to roast coffee beans. It’s quick, easy, and gives you a chance to experiment with different roast levels.
Here’s how you can use a popcorn popper:
Plug in the popper and let it warm up.
Add green coffee beans to the chamber.
Turn on the popper. The beans will start spinning and heating up.
Watch and listen for the first crack. This usually happens fast, often within 3–5 minutes.
Turn off the popper and pour the beans into a colander to cool.
Using a popcorn popper for coffee roasting results in faster roast times, which can impact the flavor profile of the coffee. Faster roasts tend to produce a more tangy and bright flavor, while longer drum roasts may yield a more balanced taste. The consistency of the roast can be affected by various factors such as ambient temperature and the voltage supplied to the popper, which can lead to variations in roast times and flavor outcomes.
Safety considerations for popcorn poppers:
Safety Consideration | Description |
|---|---|
Thermostat Removal | Some poppers need the thermostat removed to reach proper roasting temperatures. |
Bypass Thermal Fuse | If the popper overheats, you may need to bypass or replace the thermal fuse. |
Regular Cleaning | Clean and vacuum the chamber often to prevent chaff buildup and keep things safe. |
Popcorn poppers make the roasting process fast and fun. You get bright, lively flavors, but you might notice some inconsistency in roast levels.
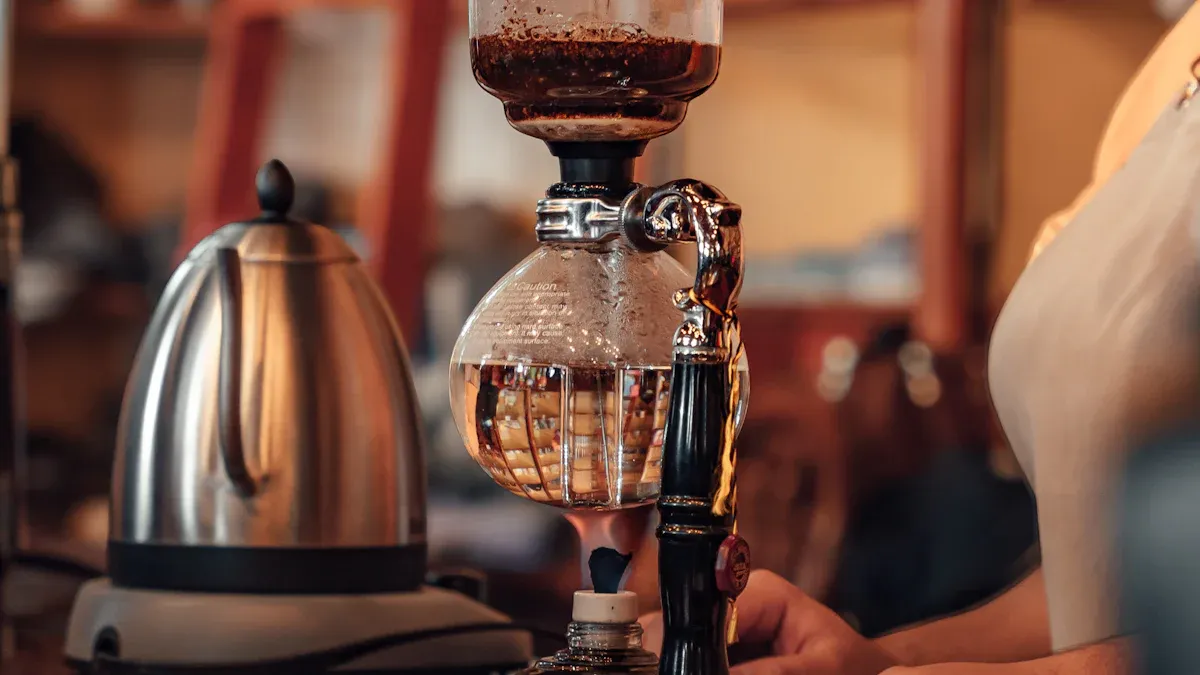
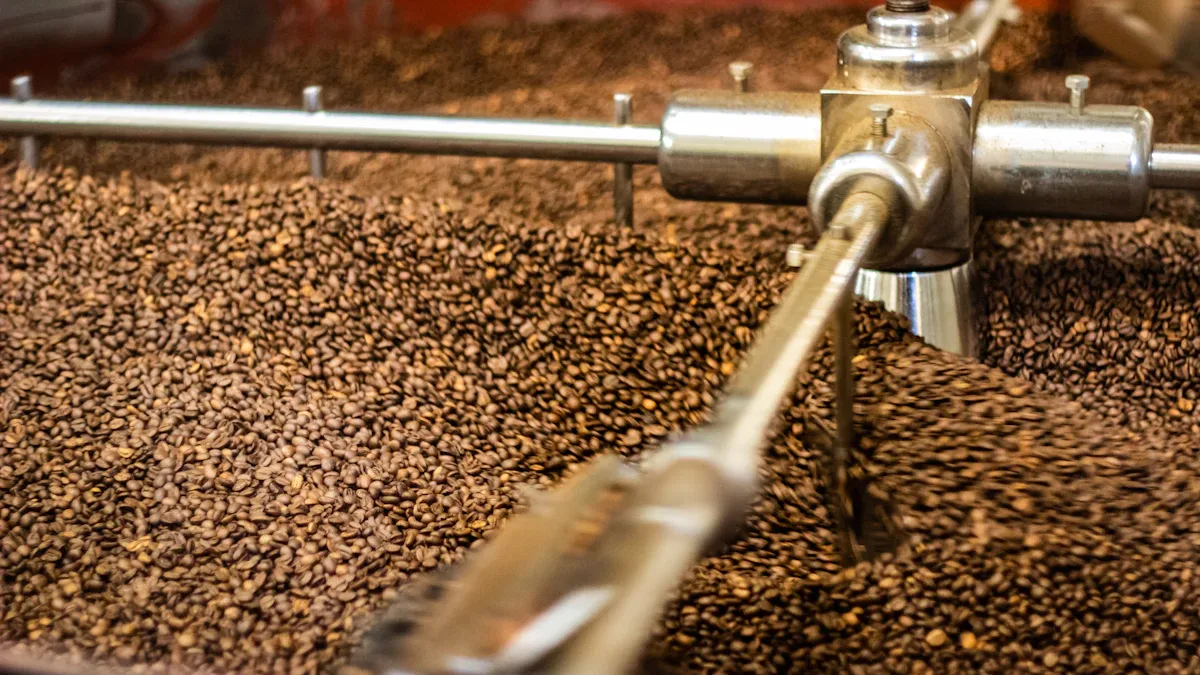
Home Roaster
If you want more control over your coffee bean roasting, you can invest in a home roaster. These machines are designed for roasting coffee and offer features that help you master the roasting process.
Here’s what you should look for:
Choose between drum roasters and fluid-air bed roasters.
Check the user interface for ease of use and repeatability.
Pick a size that matches your coffee consumption.
Look for adjustable controls to fine-tune temperature and time.
Think about your taste preferences. Different roasters create different flavors.
A well-designed user interface isn’t just about comfort. It can improve roast quality and help you repeat your favorite results.
Types of home roasters:
Classic drum roasters
Indirectly heated drum roasters
Recirculation roasters
Fluid-bed roasters
Average roasting times with home roasters range from 8 to 15 minutes, depending on the machine and batch size. You get consistent results and can experiment with roast profiles.
Cost and maintenance:
Aspect | Cost Range |
|---|---|
Initial Purchase Price | A few hundred to several thousand dollars |
Water Filtration | $50 to $200 for the system, plus replacement filters |
Cleaning Supplies | $20 to $50 annually |
Maintenance and Repairs | $50 to several hundred dollars per service |
Power Consumption | A few dollars a month, increasing with usage |
Home roasters make it easy to learn how to roast coffee beans with precision. You can adjust every part of the roasting process and create your perfect cup.
Coffee Roasting Tips and Levels
Recognizing Roast Levels
You can spot different roast levels by looking at the beans and smelling their aroma. Each stage brings out unique flavors and scents. Here’s a quick guide to help you recognize what’s happening during roasting:
Roast Level | Visual Characteristics | Aroma Characteristics |
|---|---|---|
Light Roast | Slightly brown, no oil trace | Mild, fruity notes |
Medium Roast | Medium brown, no oil | Balanced sweetness, nutty notes |
Dark Roast | Dark brown, glossy appearance | Bold, rich aroma, hints of chocolate or caramel |
Over-Roasted | Very dark, oily surface | Smells burnt or ashy, lacking original notes |
You’ll notice that darker roasts have a bolder aroma. If you smell a burnt or ashy scent, the beans are likely over-roasted. Well-roasted beans keep enticing notes of chocolate, caramel, or fruit. These coffee roasting tips help you pick the perfect roast for your taste.
Flavor and caffeine change with roast level. Light roasts taste bright and fruity, while dark roasts offer bold, rich flavors. The caffeine content doesn’t change much, but light roasts may seem stronger if you measure by volume. Here’s a quick look:
Roast Level | Caffeine Content (%) |
|---|---|
Light | 1.13 |
Medium | 1.17 |
Dark | 1.08 |
Cooling and Resting Beans
After roasting, you need to cool your beans quickly. Spread them in a metal colander or on a baking sheet. Stir them to release heat and stop the roasting process. Once cool, let your beans rest. This step is called degassing. Freshly roasted beans release carbon dioxide, which can affect brewing.
Here are some coffee roasting tips for cooling and resting:
Store beans in a sealed container or bag with a one-way valve.
Keep beans in a cool, dark, dry place.
Wait at least 12 hours before brewing. For the best flavor, rest beans for 3–6 days.
Grind beans just before brewing for maximum freshness.
Don’t put beans in the fridge. They absorb moisture and odors.
Resting lets flavors develop and mature. Beans become smoother and more balanced. You’ll taste the difference in every cup.
Storing Roasted Beans
Using BN PACK Coffee Bags
You’ve roasted your beans and let them rest. Now, you want to keep that fresh flavor as long as possible. The right storage makes all the difference. BN PACK coffee bags are designed to help you do just that. These bags use airtight seals and one-way valves to lock in freshness and let gases escape without letting air in. This keeps your beans tasting great for weeks.
“The best way to store coffee is to store it in the bag it comes in,” Vonie says. When coffee is roasted, gases (mostly carbon dioxide) form inside the beans and need to escape. “Most coffee bags are designed with a gas-release valve on them, which does a great job of letting that gas expel without letting air in.”
BN PACK coffee bags also use barrier layers and opaque materials. These features protect your beans from moisture, light, and oxygen. You don’t have to worry about your coffee going stale or losing its aroma. Here’s a quick look at what makes BN PACK coffee bags stand out:
Feature | Benefit |
|---|---|
Airtight seals | Prevent oxidation, preserving rich flavors and freshness. |
One-way valve | Lets gases escape, keeps air out, maintains flavor and aroma. |
Barrier layers | Shields against moisture, prevents staleness and mold. |
Opaque materials | Blocks UV light, protects flavor profile. |
Foil | Strong barrier against moisture, oxygen, and light. |
You can also choose eco-friendly options. BN PACK offers recyclable and biodegradable bags, so you can enjoy your coffee and help the planet at the same time.
Storage Tips
You want your roasted beans to stay fresh and flavorful. Here are some simple tips:
Store your beans in a cool, dry place away from sunlight.
Use the original BN PACK coffee bag with a one-way valve for best results.
Only buy as much coffee as you’ll use in two to three weeks.
Avoid opening the bag too often. Each time you open it, air gets in.
If you freeze your beans, keep them in the bag and avoid thawing and refreezing.
“Roasted coffee starts losing its super-nuanced sparkle about two weeks after it’s been roasted. I recommend buying coffee you can get through in a two- to three-week stretch of time.”
BN PACK coffee bags make it easy to store your beans the right way. You get freshness, convenience, and peace of mind—all in one package.
Roasting coffee at home is all about learning and having fun. Start by picking your method and setting up a safe, well-ventilated space. Keep these tips in mind:
Begin with small batches—about 25% to 80% of your roaster’s capacity.
Monitor temperature and time closely, especially during the first and second crack.
Keep notes on each roast. Tracking your process helps you repeat your best results and improve over time.
Practice makes perfect. Enjoy the journey and savor every cup of your fresh, homemade coffee!