
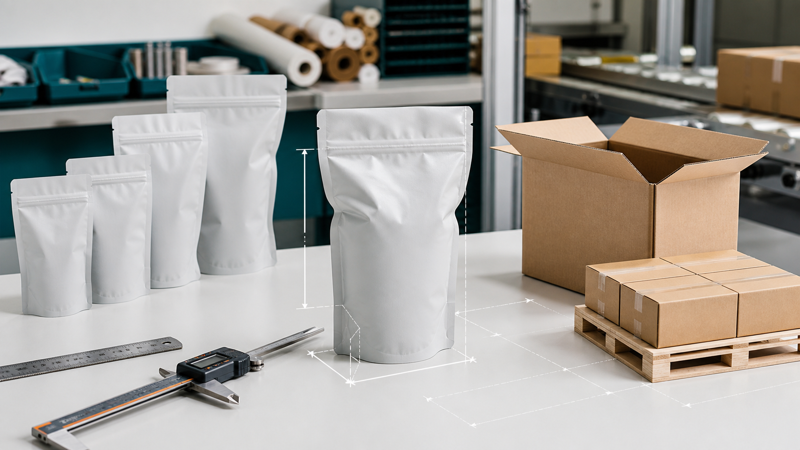
A stand-up pouch is usually quoted with three simple dimensions—width, height, and bottom gusset—but those numbers do not describe every space the product can use. External dimensions include seals and features. Internal dimensions are reduced by side seals, the bottom construction, zipper, and top-seal allowance. After filling, the pouch gains depth and may become shorter, wider, or less regular than the empty flat sample.
Accurate measurement prevents common mistakes: choosing a pouch that holds the target weight only when overfilled, placing a zipper too low, ordering cartons from flat dimensions, or assuming every product with the same net weight needs the same bag. The reliable method connects flat pouch dimensions, actual fill trials, filling-machine requirements, and packed shipping measurements.
Confirm the Supplier’s Dimension Convention
Most stand-up pouches are described as width × height + gusset, but suppliers may show the gusset as the full opened depth, the depth of one folded panel, or a paired notation. For example, a bottom fold marked “40 + 40 mm” may open to approximately 80 mm, while another drawing may simply state “80 mm gusset.” Never compare numbers without the dieline.
Ask whether width and height are measured to the outer cut edges or between seals. Confirm whether the listed height includes the top sealed header, zipper, hang hole, tear notch, or area that will be removed during opening. A dimensioned drawing should identify finished tolerances and the reference points used by quality control.
Measurement Reference Table
| Measurement | Where to measure | Why it matters | Common mistake |
|---|---|---|---|
| Finished width | Outer left edge to outer right edge on a flat pouch | Dieline, filling-machine fit, carton planning | Treating it as usable internal width |
| Finished height | Bottom outer edge to top outer edge | Shelf height, artwork, overall carton length | Forgetting the disposable header above the zipper |
| Bottom gusset | Fold depth according to the supplier’s convention | Capacity, standing footprint, filled depth | Comparing half-gusset and full-gusset values |
| Usable fill height | Internal bottom transition to the required top-seal clearance | Fill volume and product headspace | Filling into the zipper or final seal area |
| Filled thickness | Maximum front-to-back depth after normal filling | Carton count and pallet efficiency | Using the flat gusset as the finished thickness |
| Seal width | Across each side and bottom seal | Internal space and strength | Ignoring seal variation when sizing artwork or product |
The table is a measurement framework, not a substitute for a supplier drawing. Gusset geometry, seal shape, laminate stiffness, and product behavior still determine the final filled form.
Measure Finished Width and Height
Lay an empty pouch flat without stretching it. Smooth only loose wrinkles and measure the outer cut edges with a steel rule or calibrated device. For routine quality control, use the same conditioning, surface, and method every time. Flexible material moves under pressure, so excessive tension can create inconsistent results.
Finished width is not the clear opening. Side seals consume part of it, and zipper end seals may narrow the top further. Measure the actual mouth after cutting the header and opening the zipper if scoops, nozzles, or product pieces need a minimum access width.
Finished height includes areas that may never hold product. The top seal above a zipper provides tamper evidence and package integrity before first opening. Below it, zipper flanges and clearance reduce usable space. The bottom gusset also rises into the interior when the pouch is flat. Product should not be specified to occupy the entire outside rectangle.
Understand Bottom-Gusset Measurements
To measure a folded gusset, locate the inward fold and the lower external edge. Record the distance according to the supplier’s drawing, then gently open the base to understand the approximate footprint. Do not force it flat beyond its natural geometry because seals limit expansion.
The opened bottom is rarely a perfect rectangle. Curved Doyen seals, K-seals, plow bottoms, and other constructions create different usable profiles. Two pouches with the same nominal gusset depth can hold different amounts or stand differently. Fill testing is more reliable than a geometric estimate.
The guide to calculate stand-up pouch volume can support early sizing, but theoretical volume should be treated as a screening value. Product density, settling, particle shape, trapped air, and desired shelf appearance determine practical capacity.
Calculate Usable Fill Height
Usable fill height starts above the bottom region that cannot open fully and ends below the zipper or final seal clearance. Ask the filler for the minimum clean area required by the sealing jaws. Product in this zone can cause wrinkles, channels, weak seals, or contamination.
For stand-up zipper pouches, keep product below the zipper during filling. Fine powders may dust the profile and flange even when the nominal fill level is lower, so additional headspace or extraction may be needed. Large pieces need enough opening width to pass without scraping the seal area.
Mark the minimum, target, and maximum fill levels on transparent test pouches or temporary samples. Observe whether the product reaches a stable position after vibration or settling. A pouch that looks properly filled immediately may develop excessive headspace after distribution.
Measure Product Density and Fill Behavior
Net weight does not determine pouch size by itself. One kilogram of dense powder occupies far less space than one kilogram of bulky snacks. Even similar products vary with grind, particle size, moisture, aeration, and packing method.
Measure bulk density using a repeatable procedure. Fill a known-volume container without unusual compression, level it, and weigh the product. Repeat several times. If the filling process vibrates, vacuums, or settles the product, measure density after a comparable treatment as well.
Irregular pieces create voids and may bridge near the zipper. Oily products can reduce friction and settle differently, while powders may trap air and expand immediately after filling. Use multiple production-representative batches to capture variation.
Run a Physical Fill Trial
Obtain several candidate sizes in the intended structure or a close stiffness match. Fill them with the real product using the planned equipment where possible. Record net weight, fill time, product level, headspace, pouch weight, zipper contamination, final seal quality, and filled dimensions.
Inspect the package from the front, side, and bottom. The pouch should stand without rocking, show the artwork correctly, and leave enough top area for gripping and sealing. Squeeze and handle it as consumers will. A technically sufficient volume may still look underfilled or awkward on shelf.
Repeat after normal settling. For coffee, granules, powders, and other flowable products, vibration during shipping can change the shape. For kraft stand-up pouches, paper stiffness may create a squarer empty profile but also resist full gusset opening; test the final laminate rather than a thin plastic substitute.
Measure Filled Thickness for Cartons
Filled thickness is the maximum front-to-back dimension under normal product distribution. Measure several pouches after settling, not just the most attractive sample. Include bulging near the middle, zipper, and gusset. Do not compress the pouch to the target carton dimension unless the planned case pack applies the same safe compression.
Arrange pouches in the intended orientation: upright, flat, alternated head-to-foot, or nested. Measure the full group rather than multiplying one pouch thickness, because flexible packs can nest and redistribute. Add carton manufacturing tolerance and enough clearance for packing without damaging seals or valves.
Check case count against weight limits. A carton may fit the pouches geometrically but become too heavy for handling or compress the bottom row. If pouches contain gas or headspace, stacking and altitude can increase stress.
Translate Cartons Into Pallet and Shipping Dimensions
Use the actual filled carton dimensions and gross weight to build the pallet pattern. Consider overhang, pallet height, stacking strength, stretch wrap, corner protection, and container limits. Optimize units per pallet only after confirming that compression does not cause leaks, zipper distortion, or shelf damage.
For e-commerce parcels, measure the pouch with any secondary wrap, cushioning, or mailer. A single flexible pouch can shift inside a large box and experience repeated impact. Shipping size should include the protective system, not only the primary package.
Measurement Checklist
- Obtain the exact production dieline and supplier dimension convention.
- Record external width, height, gusset notation, seals, zipper, and top-clearance dimensions.
- Calculate theoretical volume only as an initial screening tool.
- Measure product bulk density and variation under realistic settling conditions.
- Fill multiple candidate pouches with the actual product and process.
- Record usable fill height, headspace, mouth opening, seal cleanliness, and appearance.
- Measure maximum filled thickness after settling and in the intended carton arrangement.
- Validate carton, pallet, and e-commerce dimensions with packed physical samples.
Stand-up pouch measurement is a progression from flat drawing to filled package to shipping system. External dimensions define manufacturing, internal clearances define fillability, and settled dimensions define cartons and logistics. When all three are measured consistently, capacity and freight decisions become far more reliable.