
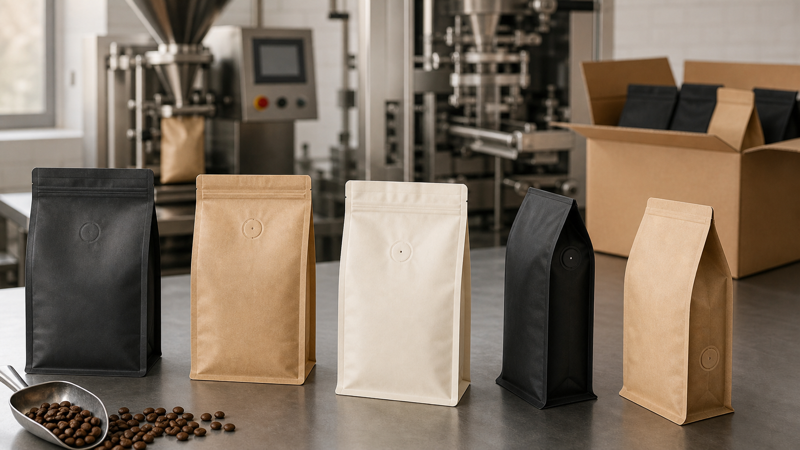
A one-way degassing valve is small, but its position affects filling, venting, artwork, shelf appearance, carton fit, and package integrity. Placing it too low can bury it in coffee or expose it to dust. Placing it too close to a zipper, fold, or seal can weaken the installation. A valve centered perfectly on a flat dieline may become visually misaligned after the filled pouch expands.
Valve placement should be treated as a functional dimension on the packaging specification. The correct location depends on coffee form, fill weight, settled product level, pouch format, filling equipment, valve application method, and shipping orientation.
Understand the Valve’s Job
Fresh roasted coffee releases carbon dioxide. A one-way valve allows internal gas to escape while limiting inward oxygen flow when the component and installation work correctly. The valve prevents excessive package inflation without requiring the roaster to leave coffee exposed for an unnecessarily long period before packing.
The guide to why packaging bags need degassing valves explains this principle. Valve performance still depends on opening pressure, flow, membrane, adhesive or heat seal, package barrier, and contamination. Position cannot correct an unsuitable valve, but a poor position can defeat a good one.
Place the Valve Above the Settled Product
The valve is generally positioned above the normal settled coffee level so beans or grounds do not press continuously against the membrane. Direct contact can restrict flow, introduce dust, or increase oil exposure. Ground coffee is especially mobile and can migrate upward during filling and transport.
Measure the highest credible product level after normal filling, vibration, and settling. Include variation between light and dark roasts, whole bean and ground coffee, and production batches. Dark roasts often have lower bulk density and may fill higher at the same weight.
Add a clearance zone rather than placing the valve exactly at the measured line. The valve flange also needs flat film around it. If headspace is too small, increase pouch height or reconsider fill weight instead of squeezing the valve into the zipper or top-seal area.
Keep Clear of Seals and Zippers
Side seals, top seals, bottom transitions, and zipper flanges create multilayer or stressed areas. The valve should sit on a stable flat panel with enough clearance for application tooling and leak inspection. A fold crossing the valve can distort the membrane or flange.
On zipper pouches, separate the valve from the zipper profile and its end seals. Filling and pouch-making equipment may use grippers or guides near the zipper, creating further clearance requirements. The header above the zipper should remain available for the final seal, tear notch, hang hole, and consumer grip.
Mark the full valve component and application tolerance on the dieline, not only a small center point. Keep text, barcodes, faces, and fine artwork outside that zone. Printing or surface coating beneath the valve may affect adhesion, so follow the converter’s requirements.
Front, Back, or Side Panel
Front-panel placement makes the valve visible and easy to inspect, but it occupies prime branding space. If integrated carefully, it can signal freshness to coffee buyers. The design should not disguise the valve as a printed symbol or place it over important copy.
Back-panel placement preserves the main brand face and may suit designs with detailed rear information. Check how the bag lies in cartons and mailers; a rear valve can be compressed against another package. It also needs clearance from labels, date codes, and seams.
Flat-bottom pouches may provide usable side panels for valve placement. This can keep front and back artwork clean, but the side panel narrows or rounds after filling. A valve too close to the gusset fold may bend, and a tight carton can press directly on it.
For side-gusset bags, the main front or back panel is often safer than a folding gusset. Every format should be reviewed as a filled three-dimensional package, not a flat artwork file.
Coordinate With Filling Equipment
Valve position can interfere with grippers, vacuum cups, opening devices, fill nozzles, guides, sealing jaws, or date coders. Ask the equipment supplier for no-go zones and stable gripping areas. If the valve is applied inline, its position must also match web direction, print repeat, and application station.
Premade coffee bags with valve should be tested on the intended filler. Observe whether the valve catches on magazines, guides, or neighboring pouches. A raised component can change stack behavior and feeding.
During filling, coffee dust should not reach the valve. Control nozzle depth, headspace, dust extraction, static, and pouch settling. If the package is squeezed to remove air before sealing, do not press product against the valve or damage its membrane.
Valve Installation Methods
Valves may be attached with adhesive, heat-sealed, or integrated using supplier-specific methods. The application process determines flange size, substrate compatibility, temperature, pressure, dwell, and inspection. The installation must remain leak-tight without damaging the pouch barrier.
For high-barrier laminates, the opening through the film and the valve interface become part of the oxygen-transmission system. Check cut quality, membrane protection, bond, and channels. A visually centered valve can still leak around the flange.
Validate bond strength and function after lamination cure, application, filling, storage, and distribution. Coffee oils, heat, cold, and flexing may affect performance over time.
Artwork and Shelf Appearance
The valve creates a visible circle, shadow, or raised area. Build it into the design rather than covering it with critical artwork. Allow for normal print-to-valve registration tolerance. A thin printed ring intended to align perfectly may expose slight production movement.
On custom coffee bags, valve position should support the visual hierarchy. It can sit in a quiet color field, align with a broad design element, or remain discreet on the back. Avoid placing it where glare or a window makes the component look like damage.
Fill trials show how panel curvature shifts the apparent position. A valve centered on the flat panel may move visually when the gusset opens. Review samples from eye level on the actual shelf.
Carton and E-Commerce Impact
Map every valve in the case pack. If pouches face the same direction, valves can press against the flat panel of the next bag. Alternating orientation may create clearance, but it can also increase packing complexity. A small divider or adjusted carton width may protect components.
Compression should not block the valve during active degassing. Fresh coffee packed immediately after roasting can inflate if the valve is obstructed. Test the full case under stacking load while monitoring package shape.
For parcel shipping, keep the valve away from hard products and box walls. Drops can make a cap-like raised component concentrate force, even though the valve is low profile. Use a snug mailer that limits movement without crushing the bags.
Performance Testing
Test valve opening and closing behavior, gas flow, oxygen ingress, flange leakage, and package inflation using the final coffee and laminate. Include the shortest roast-to-pack time, highest expected degassing rate, and largest fill.
Condition pouches at expected temperatures because gas release and material behavior change. Conduct vibration, compression, and drop testing in the final carton. Recheck valve function afterward.
Trend complaints and internal data by valve lot, pouch lane, placement, roast, and packing time. If bags inflate, determine whether the cause is blocked flow, low valve capacity, contamination, seal leakage, or unusually high degassing before moving the valve.
Placement Checklist
- Measure the highest settled coffee level across products and roast profiles.
- Keep the valve above product with a defined clearance zone.
- Maintain distance from zippers, seals, folds, tear features, and coding areas.
- Confirm front, back, or side placement on a filled three-dimensional sample.
- Obtain filling-equipment no-go zones before finalizing the dieline.
- Show the full valve flange and placement tolerance in artwork.
- Protect valves from carton compression and parcel impact.
- Test gas flow, oxygen ingress, flange integrity, and function after distribution.
- Revalidate whenever pouch dimensions, laminate, valve, coffee, or line settings change.
Good valve placement is the intersection of product level, flat film, equipment clearance, and shipping protection. When it is treated as a controlled package dimension rather than a decorative afterthought, the valve can manage degassing without disrupting filling, branding, or shelf performance.